
Table of Contents
Overview
The MIDI room studio is centered around two Ghielmetti audio patch bays and an advanced Grace monitor/speaker controller. Below you will find a routing diagram demonstrating the system's essentials.
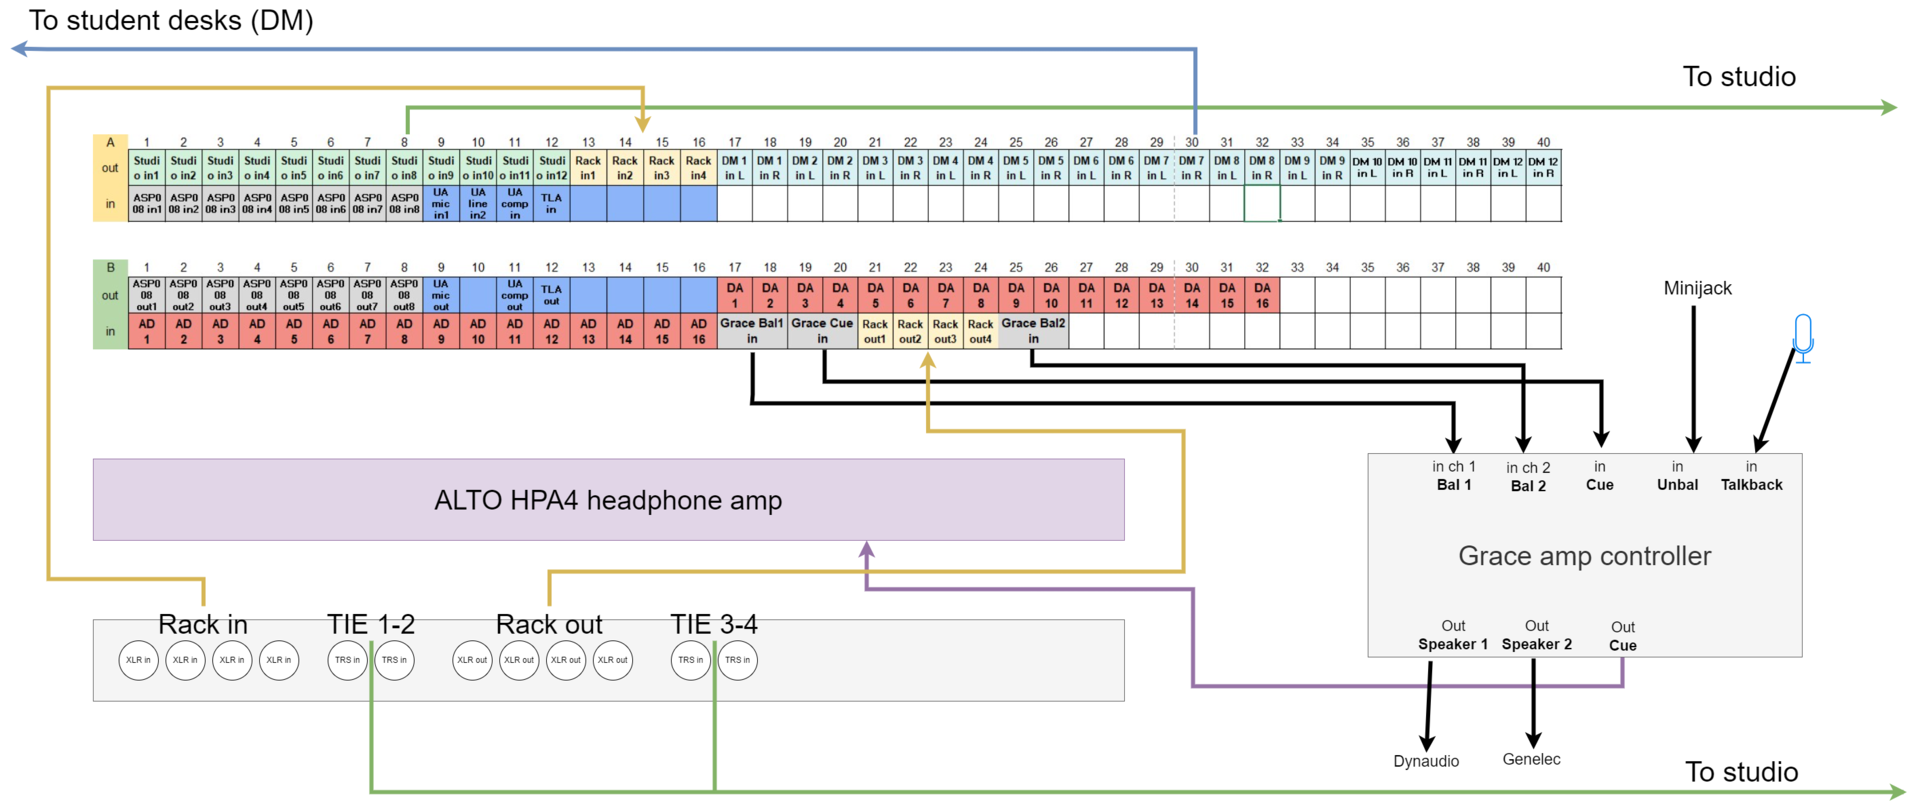
Further, each student table is equipped with a Behringer UMC202 audio interface, a mic, and a MIDI keyboard, and is connected to the studio patch bays as DM lines (direct monitoring). Below is a diagram that demonstrates the mapping between student tables and DM lines.

How To Use The Studio
The MIDI Room studio is easy to use. With only a few steps, you should be able to manage the system perfectly.
1. How To Start a Basic Session
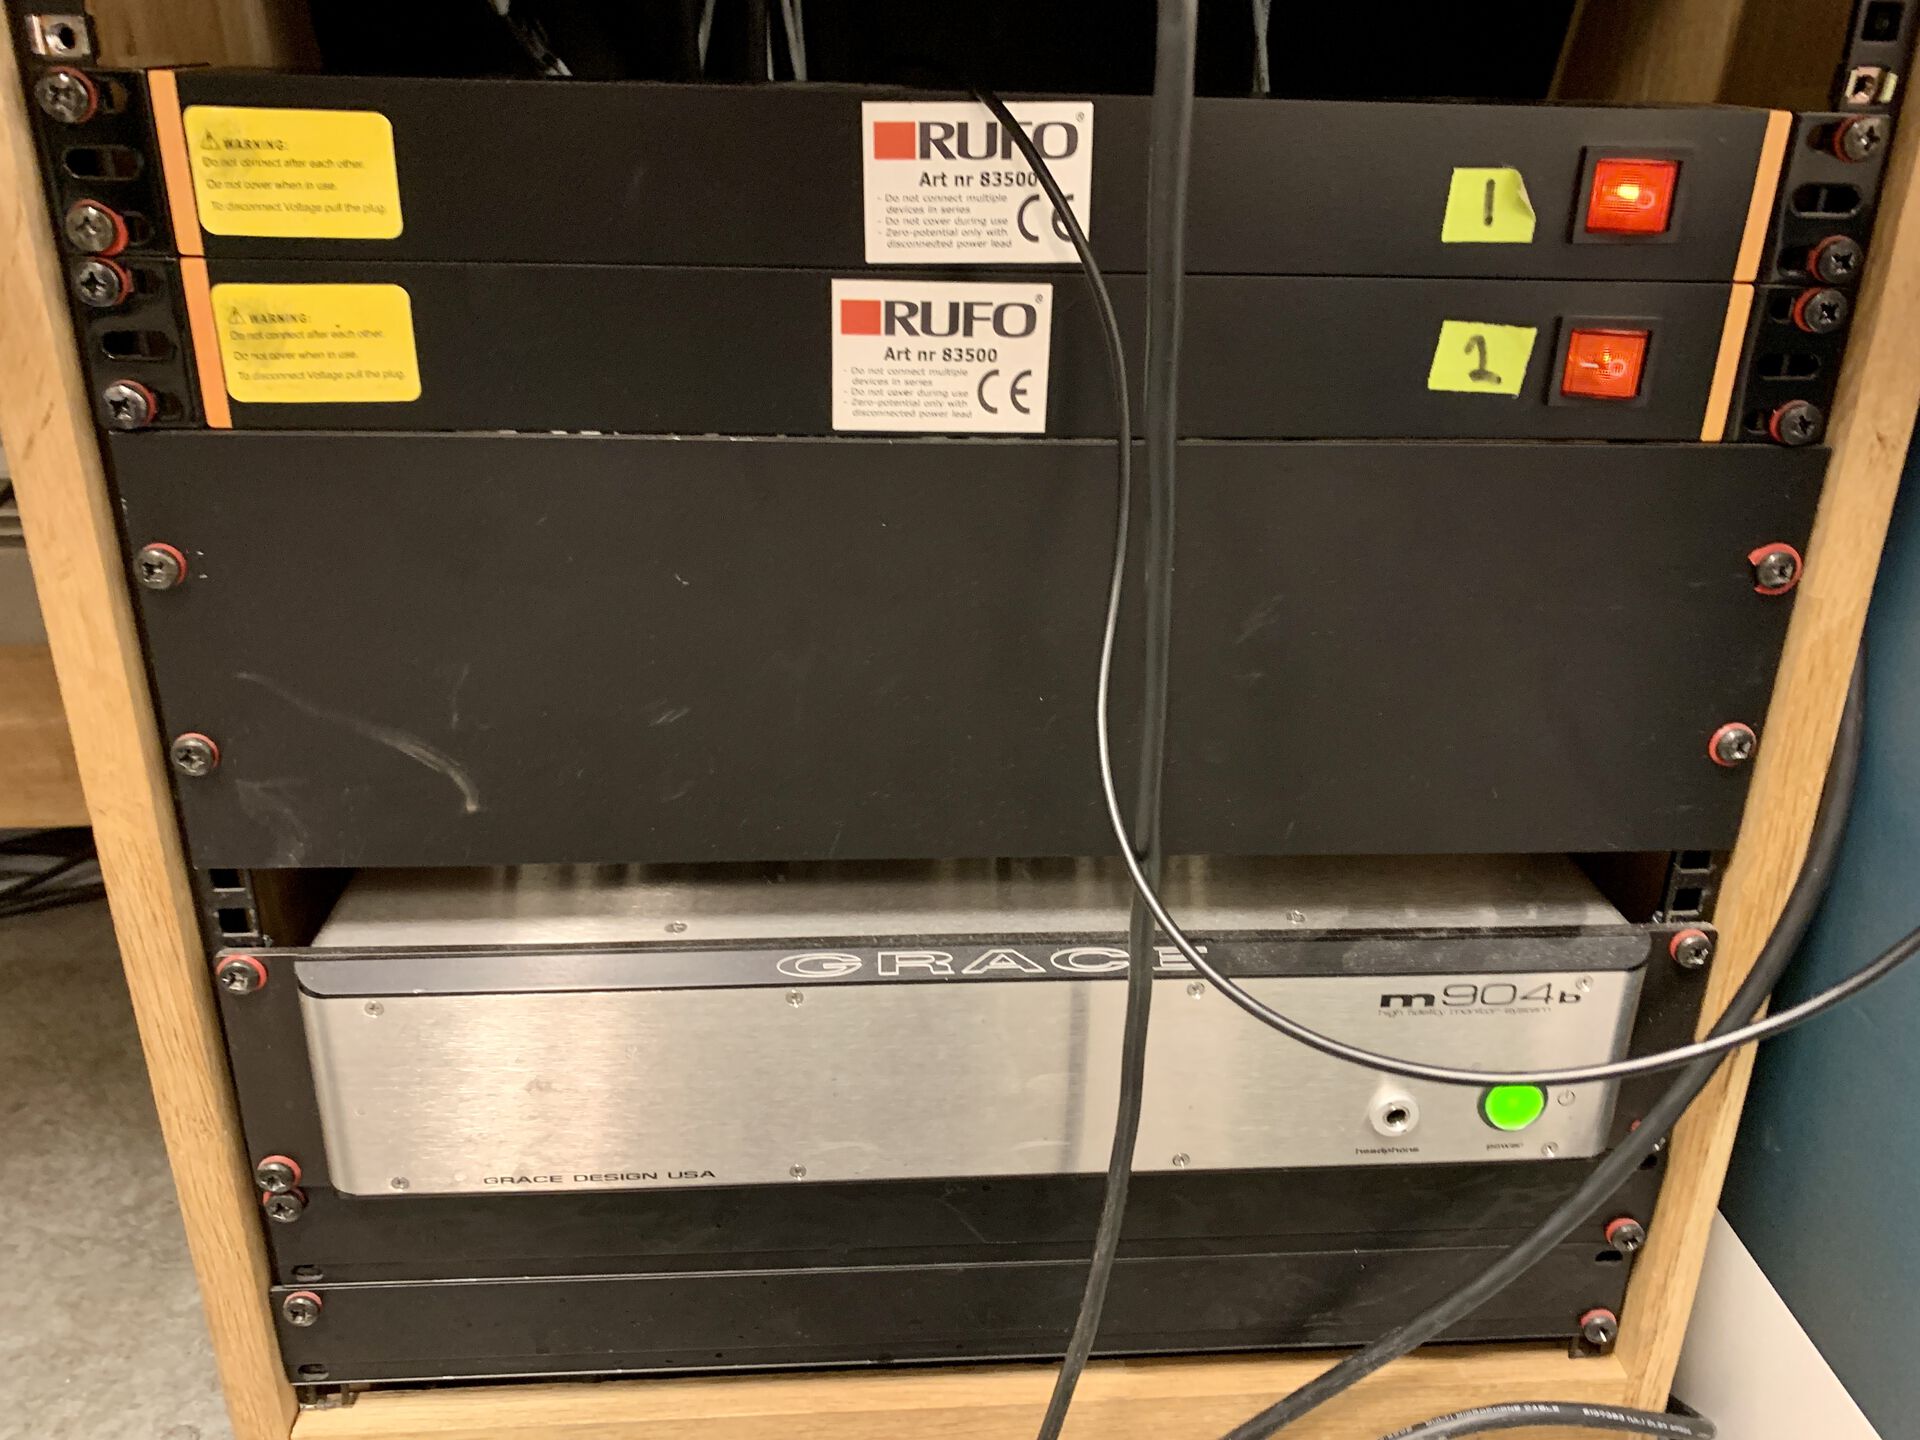
First, hit the power switches and turn on the Grace m904 amplifier.
Then, log into the Mac and open Logic Pro X. Choose Lynx Aurora as your audio interface (AD/DA). You can also use the AVID artist faders by opening the EuCon app and configuring the faders from there. There are videos online of how to use the AVID faders with Logic.
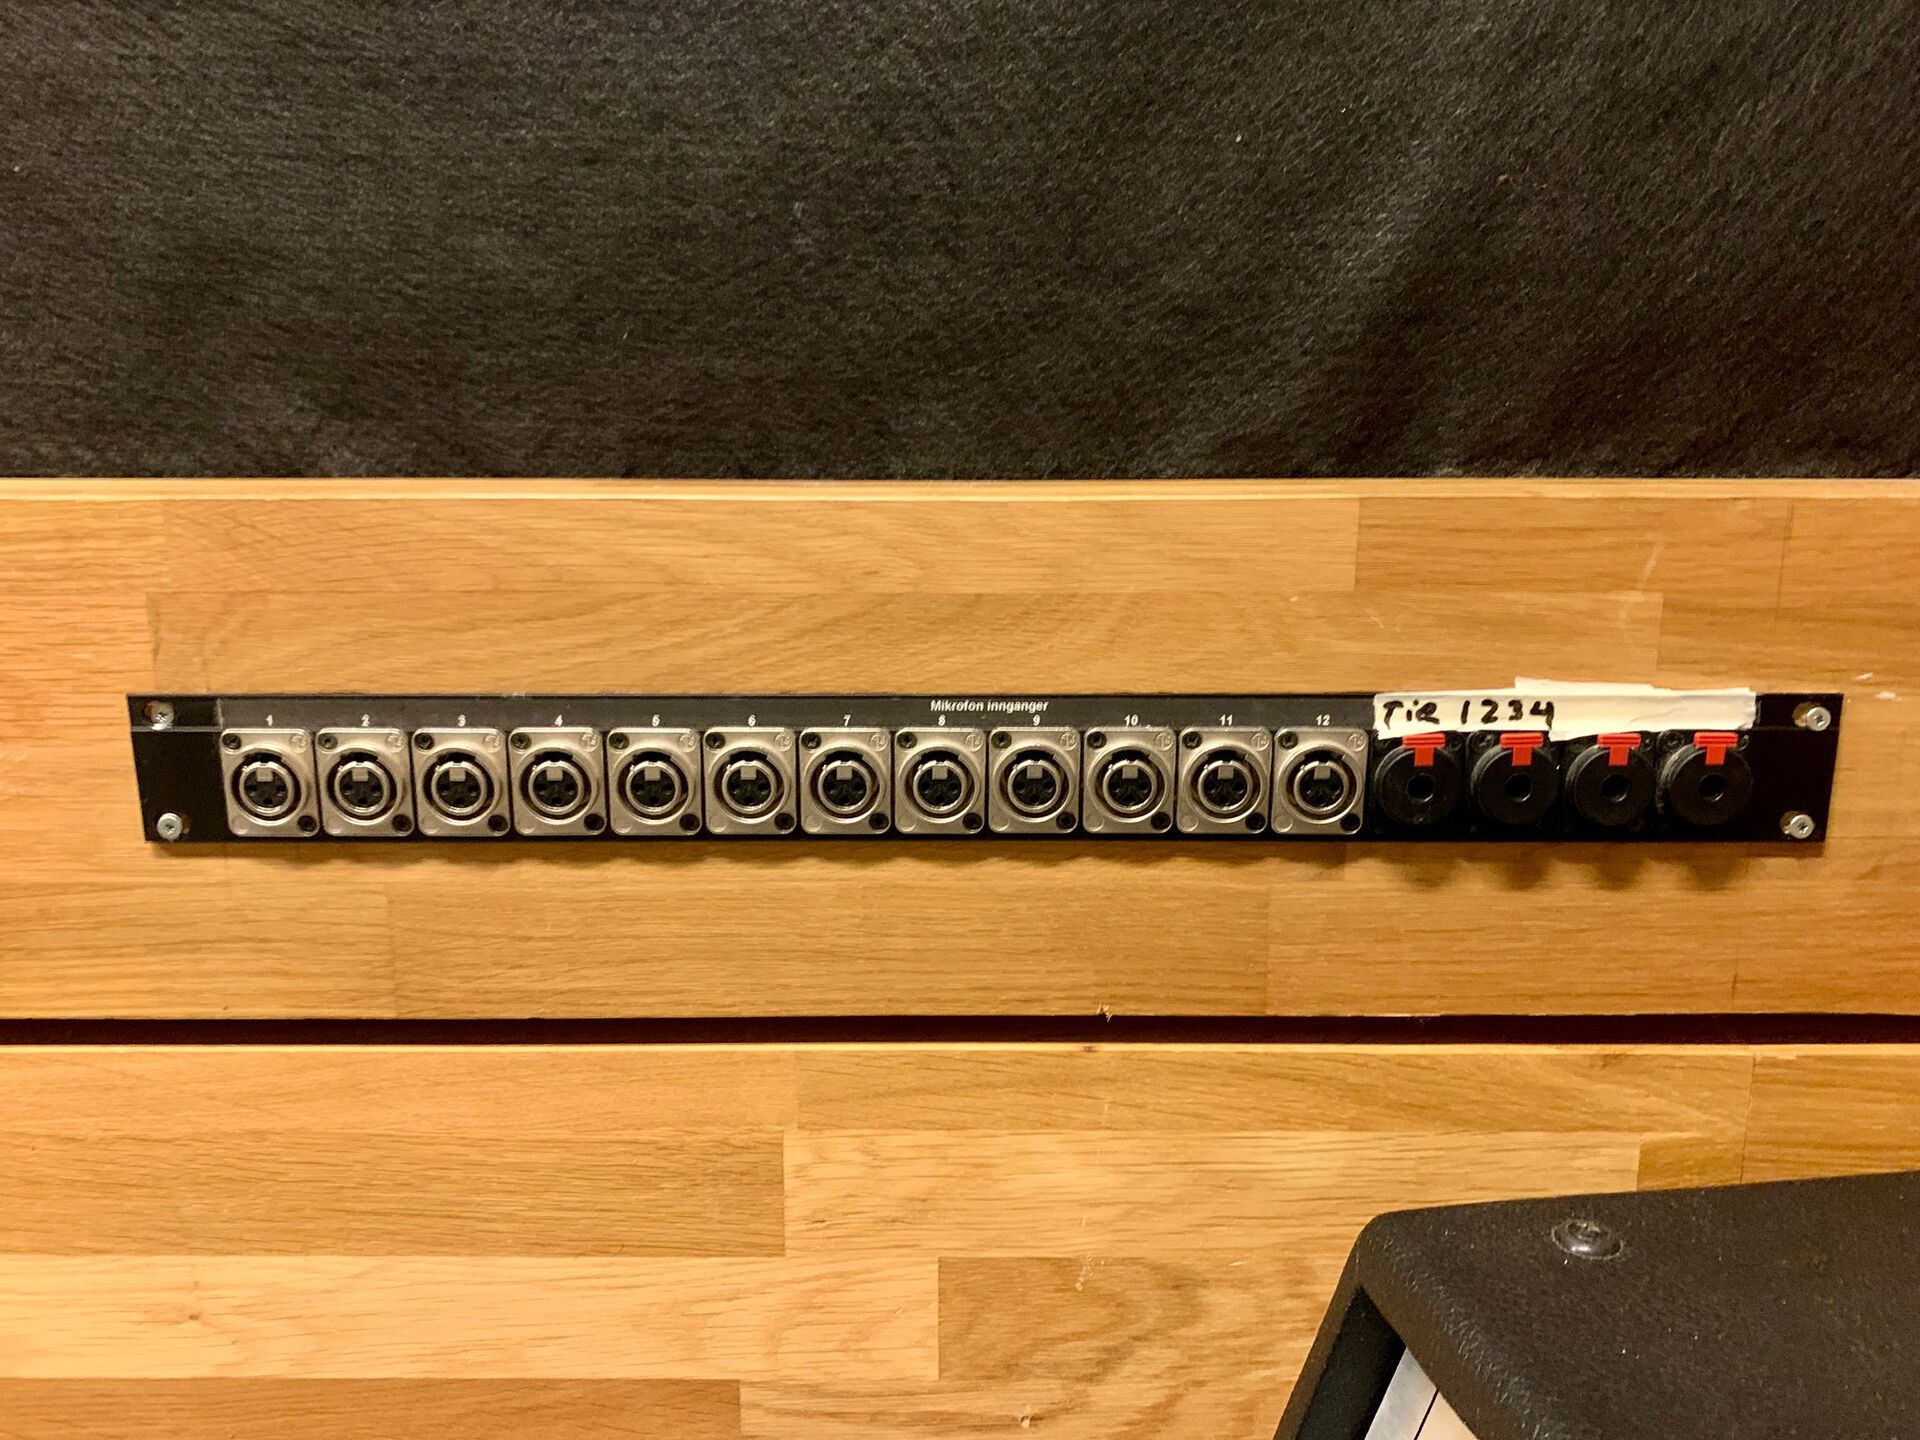
To record from the live room, connect XLR cables to the dedicated XLR patch bay. This is connected to the patch bays in the control room called "Studio in1, in2, in3, etc.". Route the signal to desired preamps and into the Lynx Aurora via the DA inputs.
2. How To Use The Grace Controller
The Grace monitor controller is connected to two speakers, a pair of Dynaudio (spkr 1) on the wall and a pair of nearfield Genelecs (spkr 2) near the Mac. To change speakers, simply toggle the spkr sel button and adjust the main level knob (NB! The Genelecs have a separate volume fader on the front of their speaker. Make sure this is reasonably leveled).
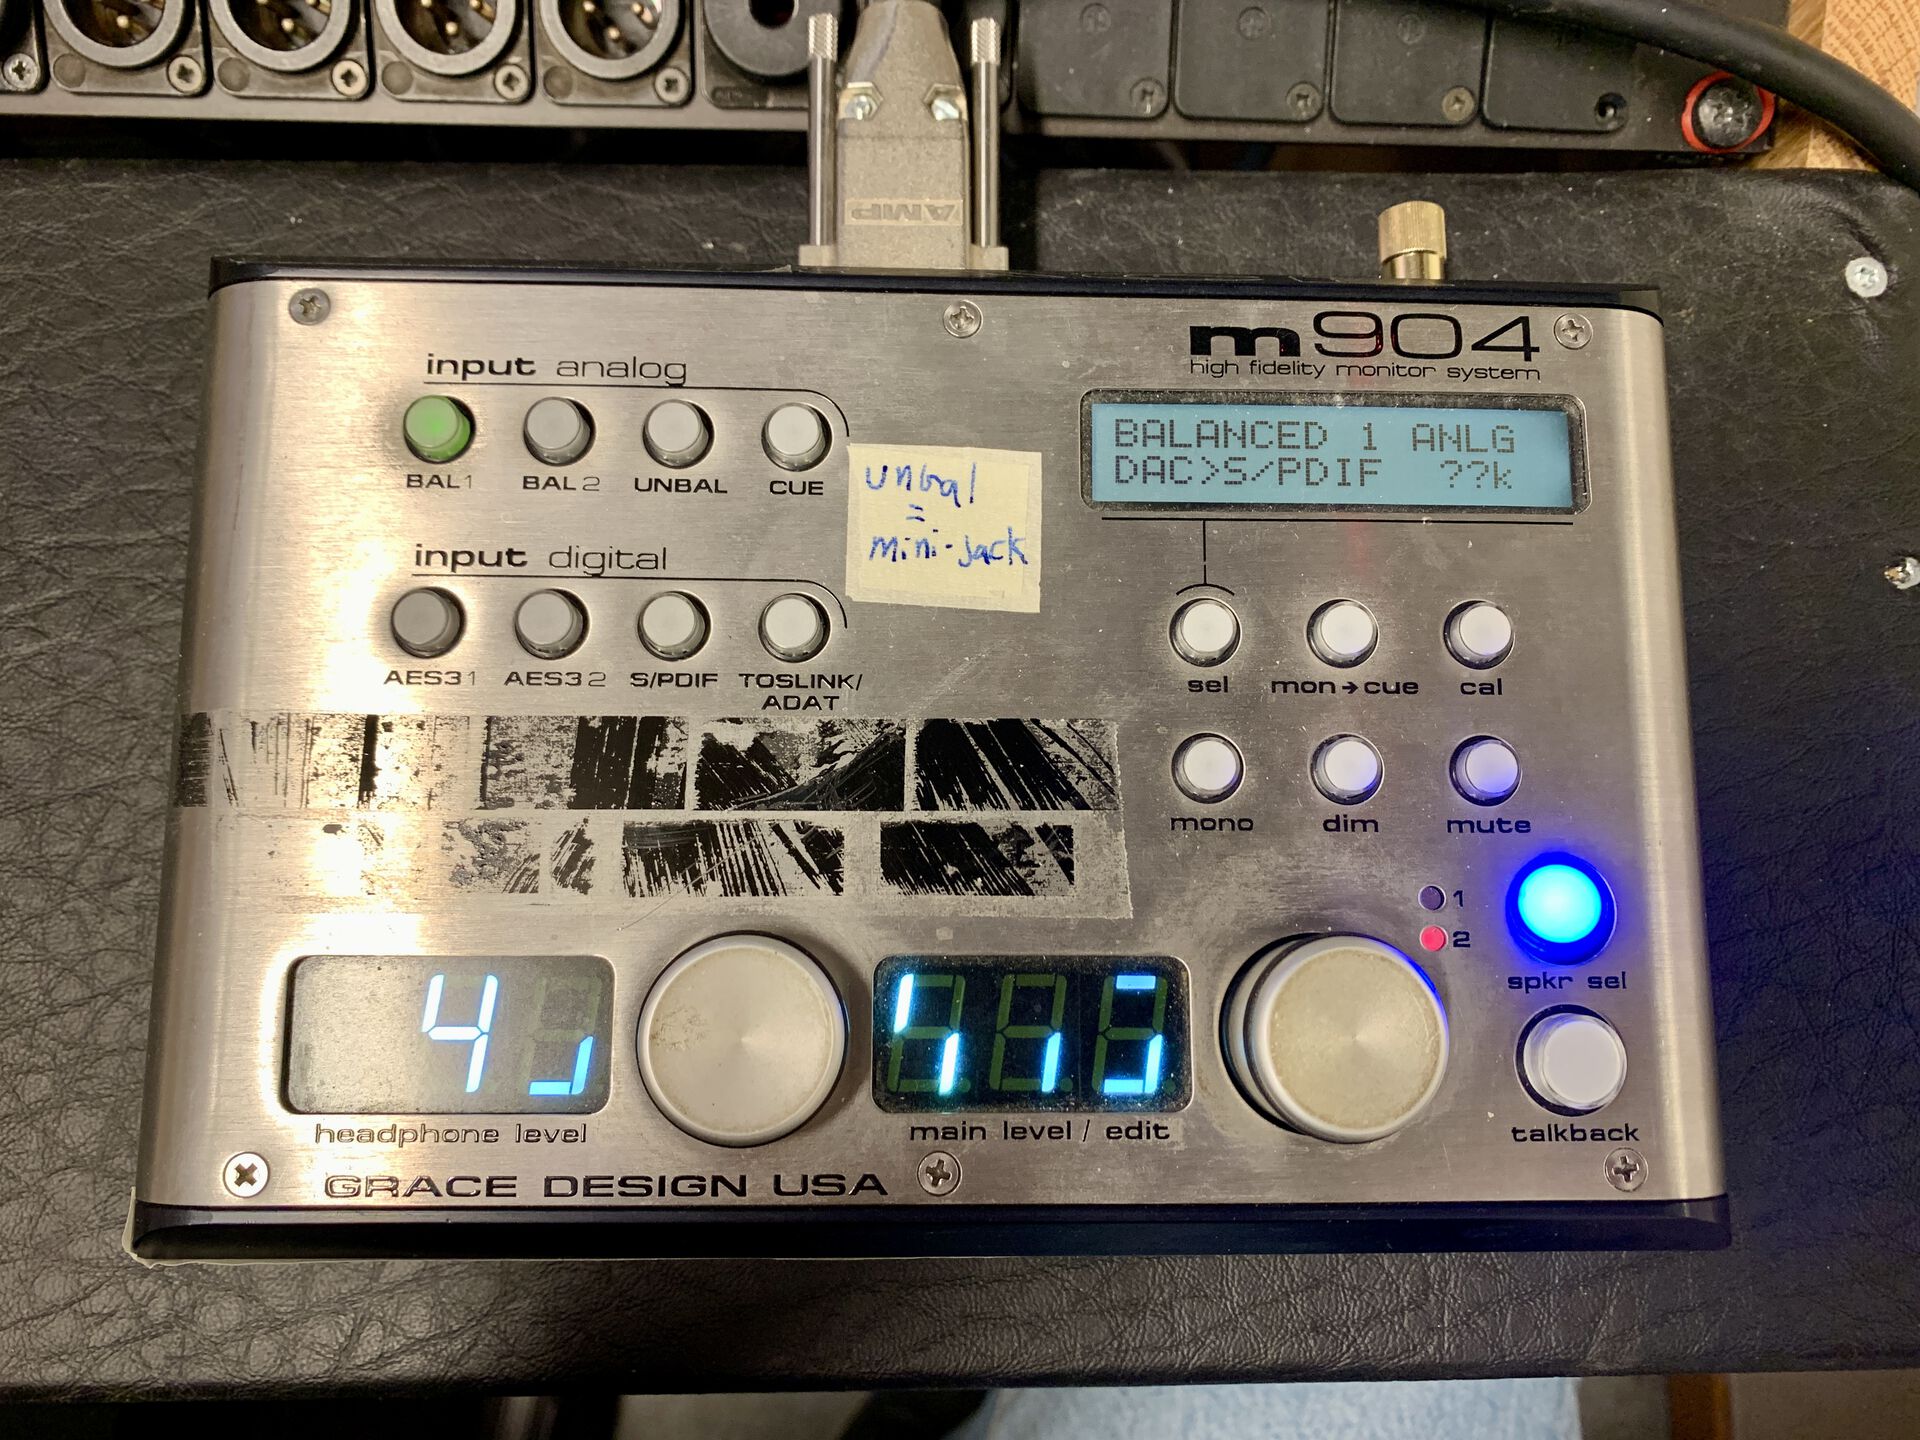
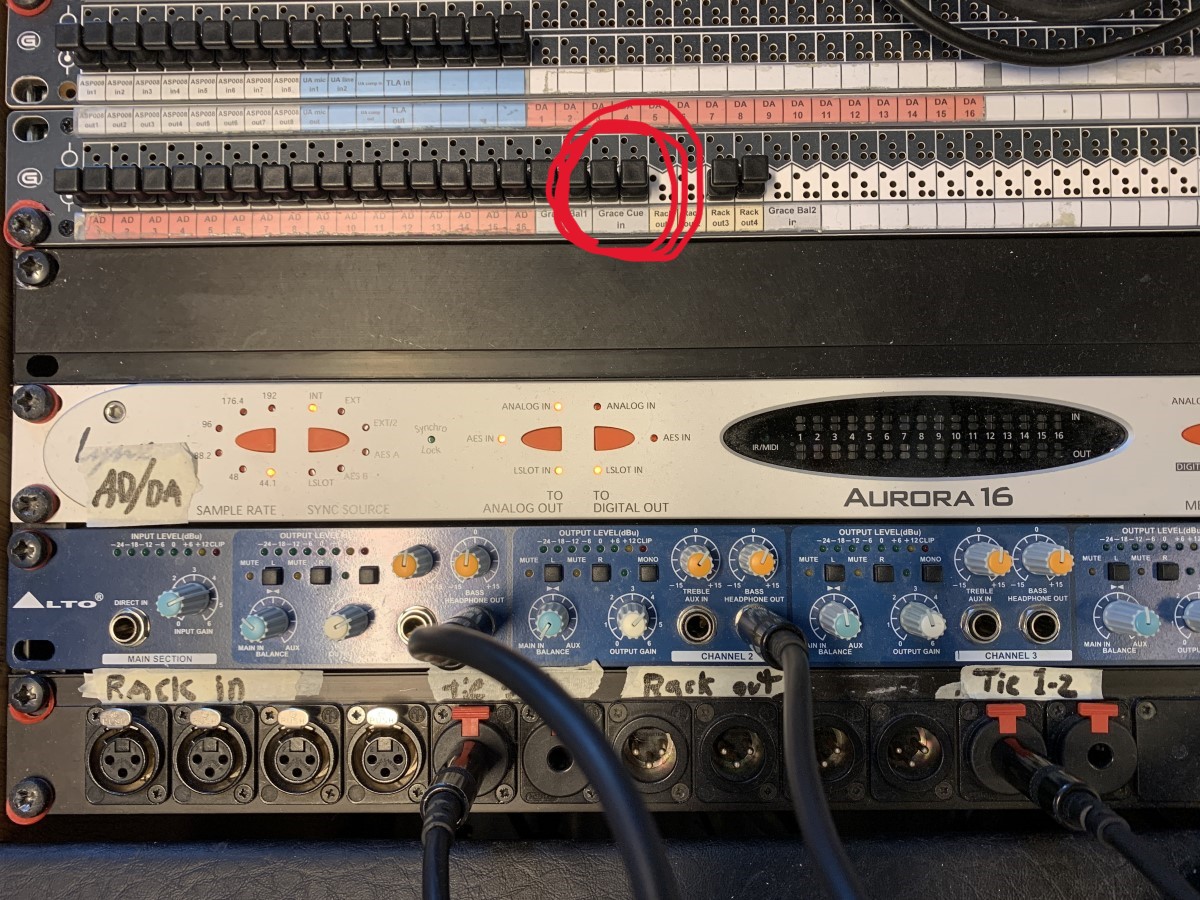
Notice that you can toggle between 4 different input analog sources, Bal1, Bal2, Unbal, and Cue. You decide what is sent to these inputs on the Ghielmetti patch bay with the connectors labeled Grace Bal1 in or Grace Bal2 in, etc.. outputs.
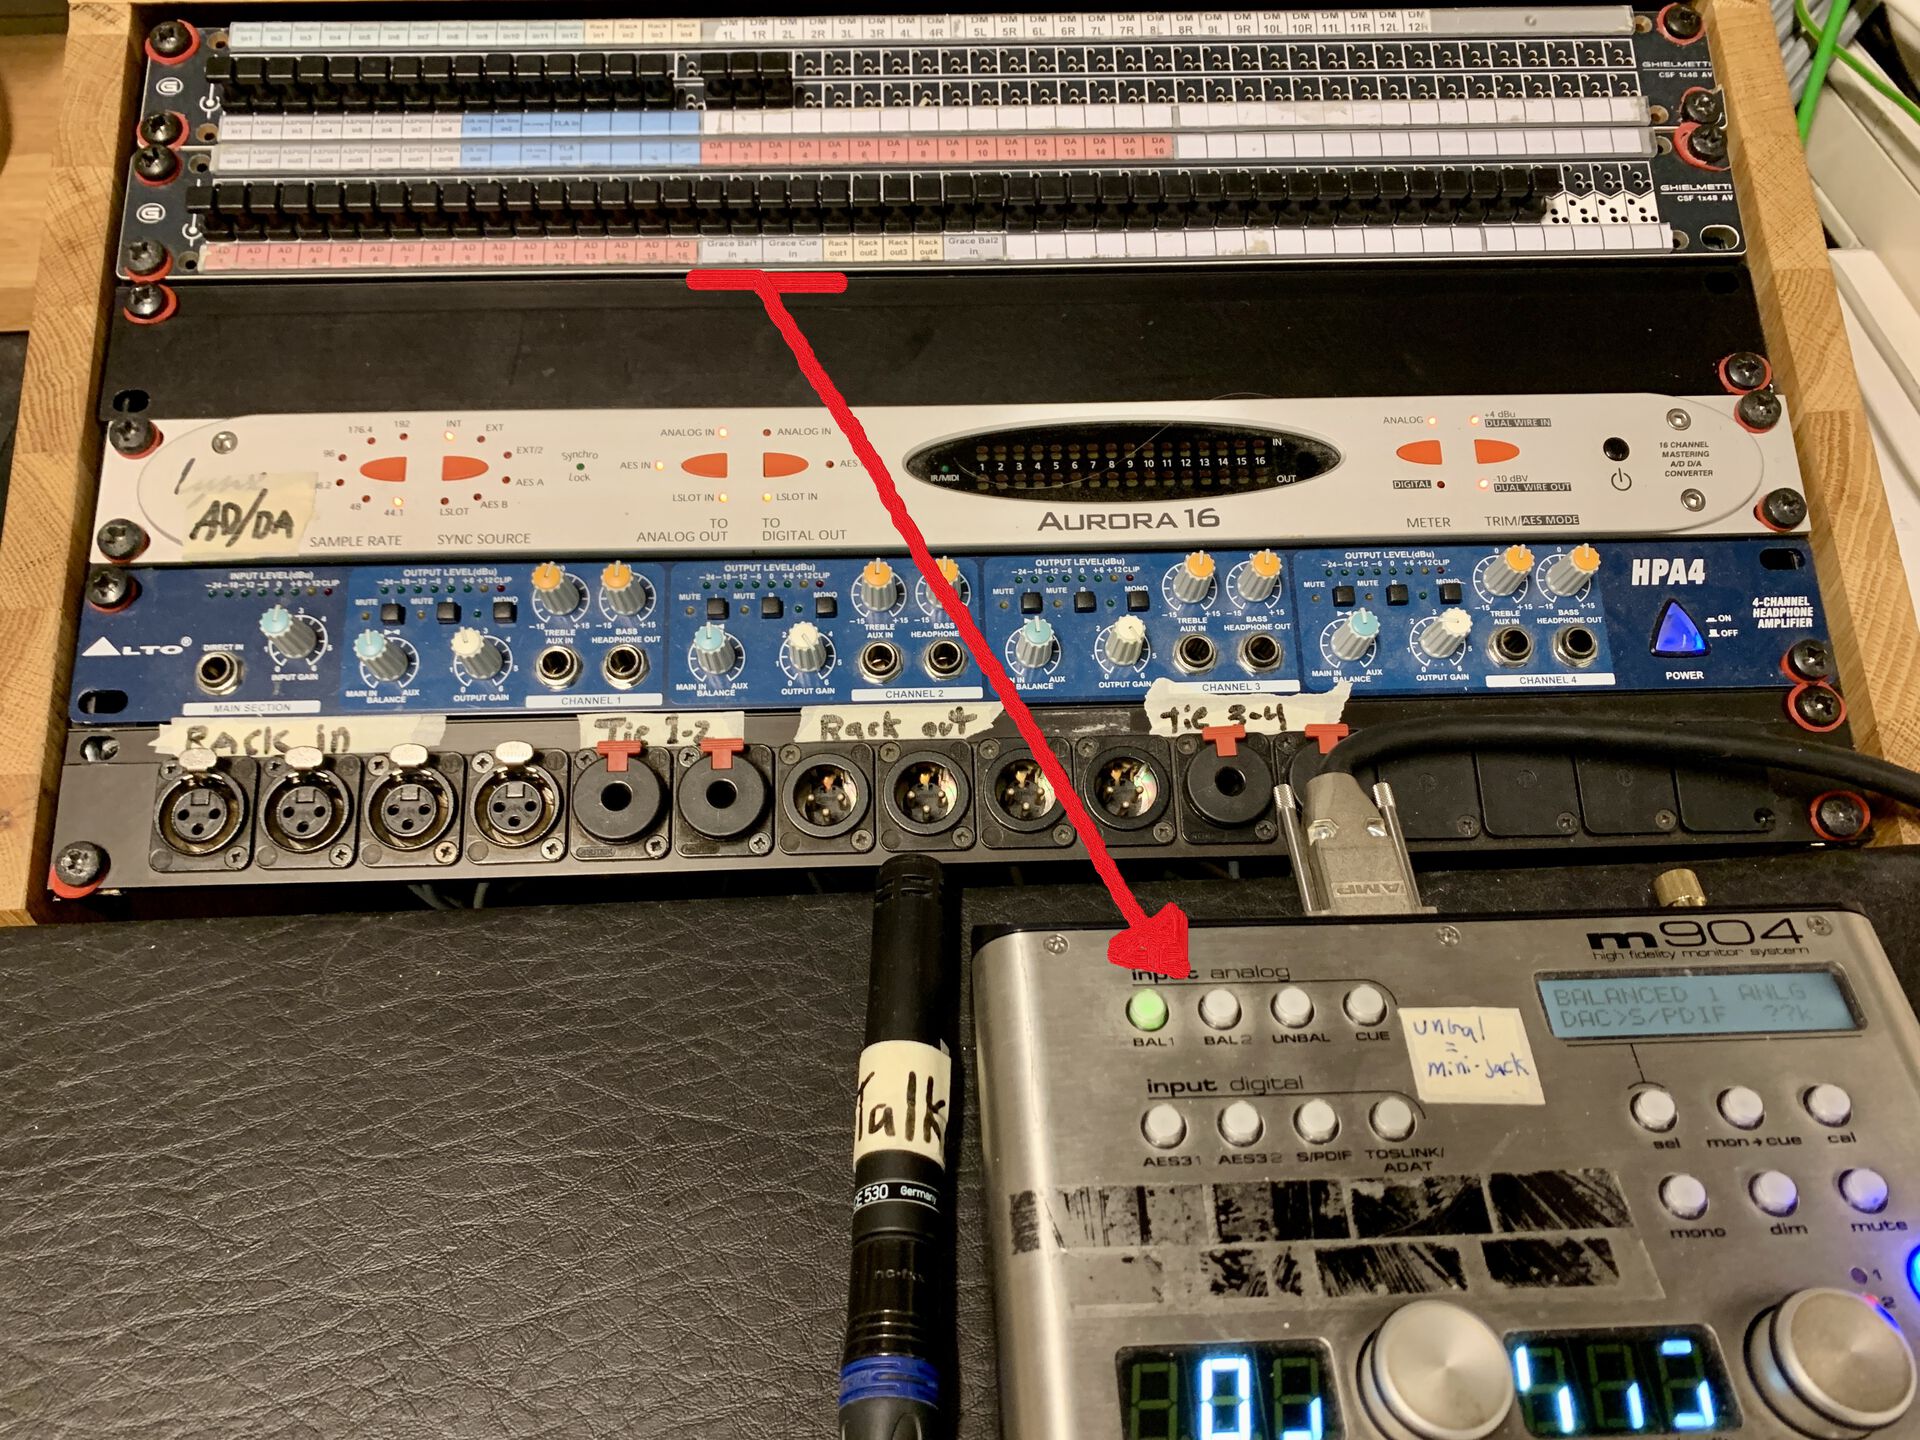
For instance, if you want to listen to a student sitting at desk DM4, connect the DM4 channels to either the Grace Bal1 or Grace Bal2 connectors on the patch bay. By default, the main AD/DA (Lynx Aurora 16) stereo output 1-2 is patched to the Grace Bal1 in. Further, AD/DA output 3-4 is connected to Grace Cue in, usually reserved for monitoring purposes.
However, the Unbal input source is different from the others. A mini-jack cable is connected directly to the Unbal input on the Grace amplifier, not via the Ghielmetti patch bays. Use this for simple listening from your laptop or phone.
3. How To Setup Monitoring In The Live Room (ALTO HPA4)
To set up monitoring for a studio session between the control room and the live room, you should use the Alto HPA4 headphone preamp in conjunction with Cue input/output on the Grace controller and the TIE lines.
To monitor the main selected outputs (Bal1, Bal2, etc..) from the HP4A headphone preamp, ensure that the mon->cue is on (with light). This will send the main monitoring outputs to the Cue outputs that go to the HP4A headphone preamp.
To listen to a separate monitor mix from the HP4A headphone preamp, first route the mix to the Grace Cue in on the Ghielmetti patch bay. Then, ensure that mon->cue button is off (no light).
Finally, in both scenarios, you need to patch a TRS channel output of the HPA4 to the TIE connectors on the control room rack. The TIE lines are connected directly to identical TIE connectors in the live room. Now, just connect a pair of headphones to the corresponding TRS connector.
Full I/O Routing Documentation
Download the technical IO routing Excel document from here
Support and Contact
Location: ZEB-bygningen (2) Timeplan (TP)