
MobileNet is a class of efficient models for mobile and embedded vision applications. It is designed with mobile devices in mind to support classification, detection and more. MobileNet is based on a streamlined architecture that uses depth-wise separable convolutions to build lightweight deep neural networks, trading off accuracy for low on-device latency and small memory footprint. In this workshop we will be using the webcam of your computer to train MobileNet to recognize video input using the ml5 image classifier.
NOTE: Remember to allow the use of webcam in your browser when prompted.
Part 1: Load the MobileNet features
We will be providing training data through the webcam so we will begin by setting up a video element using the p5 function createCapture.
What we will be doing to build our image classifier is actually extracting the features of the pretrained MobileNet model and then simply retraining the last layers of this model. This is known as transfer learning. We are transferring most of what the mobilenet model has learned to a new classification problem. Usually, deep neural networks like those used in image classification are very large. These models take a long time to train, but by extracting the features we can benefit from this intensive training while still tailoring the model to whatever image classification task we see fit.
After extracting the MobileNet features we can create a new ml5 classifier based on these features. To do this we need to give it our video variable as input and define some settings for the model, mainly how many classes we want it to be able to differentiate between.
Part 2: Setting up the image classifier interface
Now that we have set up our image classifier we can add some buttons to collect examples to train the model. In our previous ml5 workshops we have used our canvas to display and input data, but here we will be adding the buttons directly in our index.html file instead. This will make our script code a little more readable. To access and update the variables in our index.html file we will use the p5 function select inside our script.
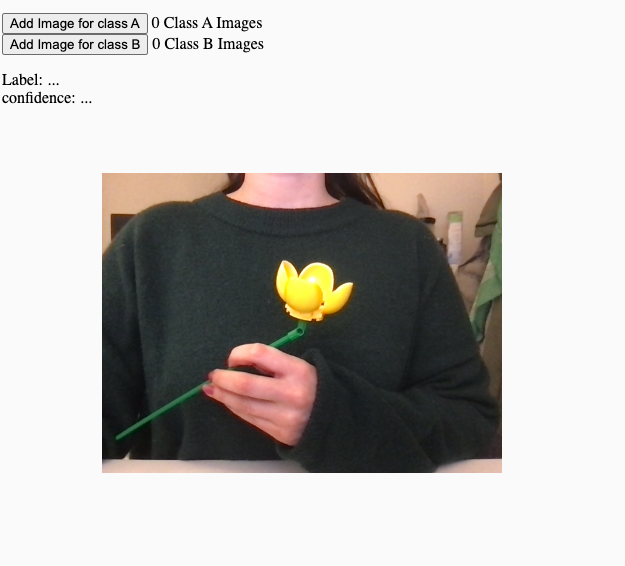
We begin by adding some buttons and labels to our index.html file. We will use two buttons to add data for our model to train on, one for each class. We also want to display how many examples we have already added for each class. In addition we will set up some text for displaying the label predicted by our model and the model's confidence score for the current prediction.
The behavior of each of these buttons is defined in our function buttonSetup using the p5 function mousePressed. Here each new image we collect from our video source is added to our image classifier and our example counter is incremented to display the current amount of examples collected for each class.
Part 3: Collecting data and training the model
In addition to the buttons we added above we will now add a train and a predict button to our button setup and index.html file.
The train button will call the ml5 function train for our image classifier. Note that this will return an error if we have not given the model any data to train on yet. While the model is training we will have access to a loss value. We can think of this loss value as a reverse measure of the model’s accuracy, the more accurate the model’s predictions are during training, the lower the loss value will be. We will print this value next to our train button while the model is training.
Our predict button will call the ml5 function classify. This function requires us to define a function to handle the results. To handle the predictions returned by our model we will define a function we will call gotResults. For now we will simply display the predicted class and the confidence the model has in its prediction using the label and confidence tags in our index.html file.
Part 4: Visualising classification
To make it more clear what our model is predicting we can generate some visual feedback. In the workshop I am training the model to recognize when I am holding my lego flower. Lets give this program some personality by displaying a smiling face when the model recognises the flower and a sad face when the flower is missing.
First, we add some images to our p5 editor project. We will use the p5 preload function to ensure that the images are loaded before the program starts running. For the visualisation we want a canvas to show up in addition to our video input so lets make a draw function. The p5 draw function runs in a loop as long as the script is running. Initially we will display a neutral face, but when the classifier has detected the flower (or the lack of flower) we want to shift the image to either happy or sad. To do this we will add some logic to our function for handling the classifier results.

Part 5: Save and load
When we are happy with our model we can save it so that we don't need to re-train it every time we reload our application. Again we will add our now save and load buttons to our html file. The save button will trigger the model to create two files, model.json and model_weights.bin. The first describes the structure of the model and the second contains the weights resulting from our training. Make sure you allow your browser to download multiple files from the p5 editor when prompted!
The load function opens a file browser and lets us select the two files we created. Now we can simply press our predict button without collecting any new data or training the model.
Going Further...
Create a video controlled instrument by adding sound
Resources:
This workshop is based on this tutorial from the ml5.js resources.